Installing Your First Character Mod
This is a very basic guide on installing your first mod. Following each step below, will teach you the fundamentals behind what tools you need, how they operate and ultimately how to install your new character.
Prerequisites
| Custom Character Tools (CCT) | Download Here |
| Character mod for installation | |
| Character mod POFO & MOVESET (if required) | |
| Data Editor (optional step) | Download Here |
Step #1 | Preparation
For the purposes of this tutorial, we will be using Joe Mashups' Tony D' Angelo because it is a completely new character and requires a POFO & MOVESET to have it fully installed and working.
It is good practice once you have downloaded your character mod, to extract it to a folder of its own somewhere on your computer.
If your character does not require a POFO & MOVESET, then move to the next step.
Next, if your character requires a unique slot, meaning that you are not replacing an existing one and are extending your roster, you will require a POFO & MOVESET. These can be downloaded from ProWrestlingMods.io or from the ProWrestlingMods' Discord. Place your downloaded POFO & MOVESET inside the folder with your downloaded character for ease of access.
When you have followed these steps, you should have something similar to the image below.

Step #2 | Introduction to Tools
Load up Custom Character Tools (CCT). You will be presented with the following.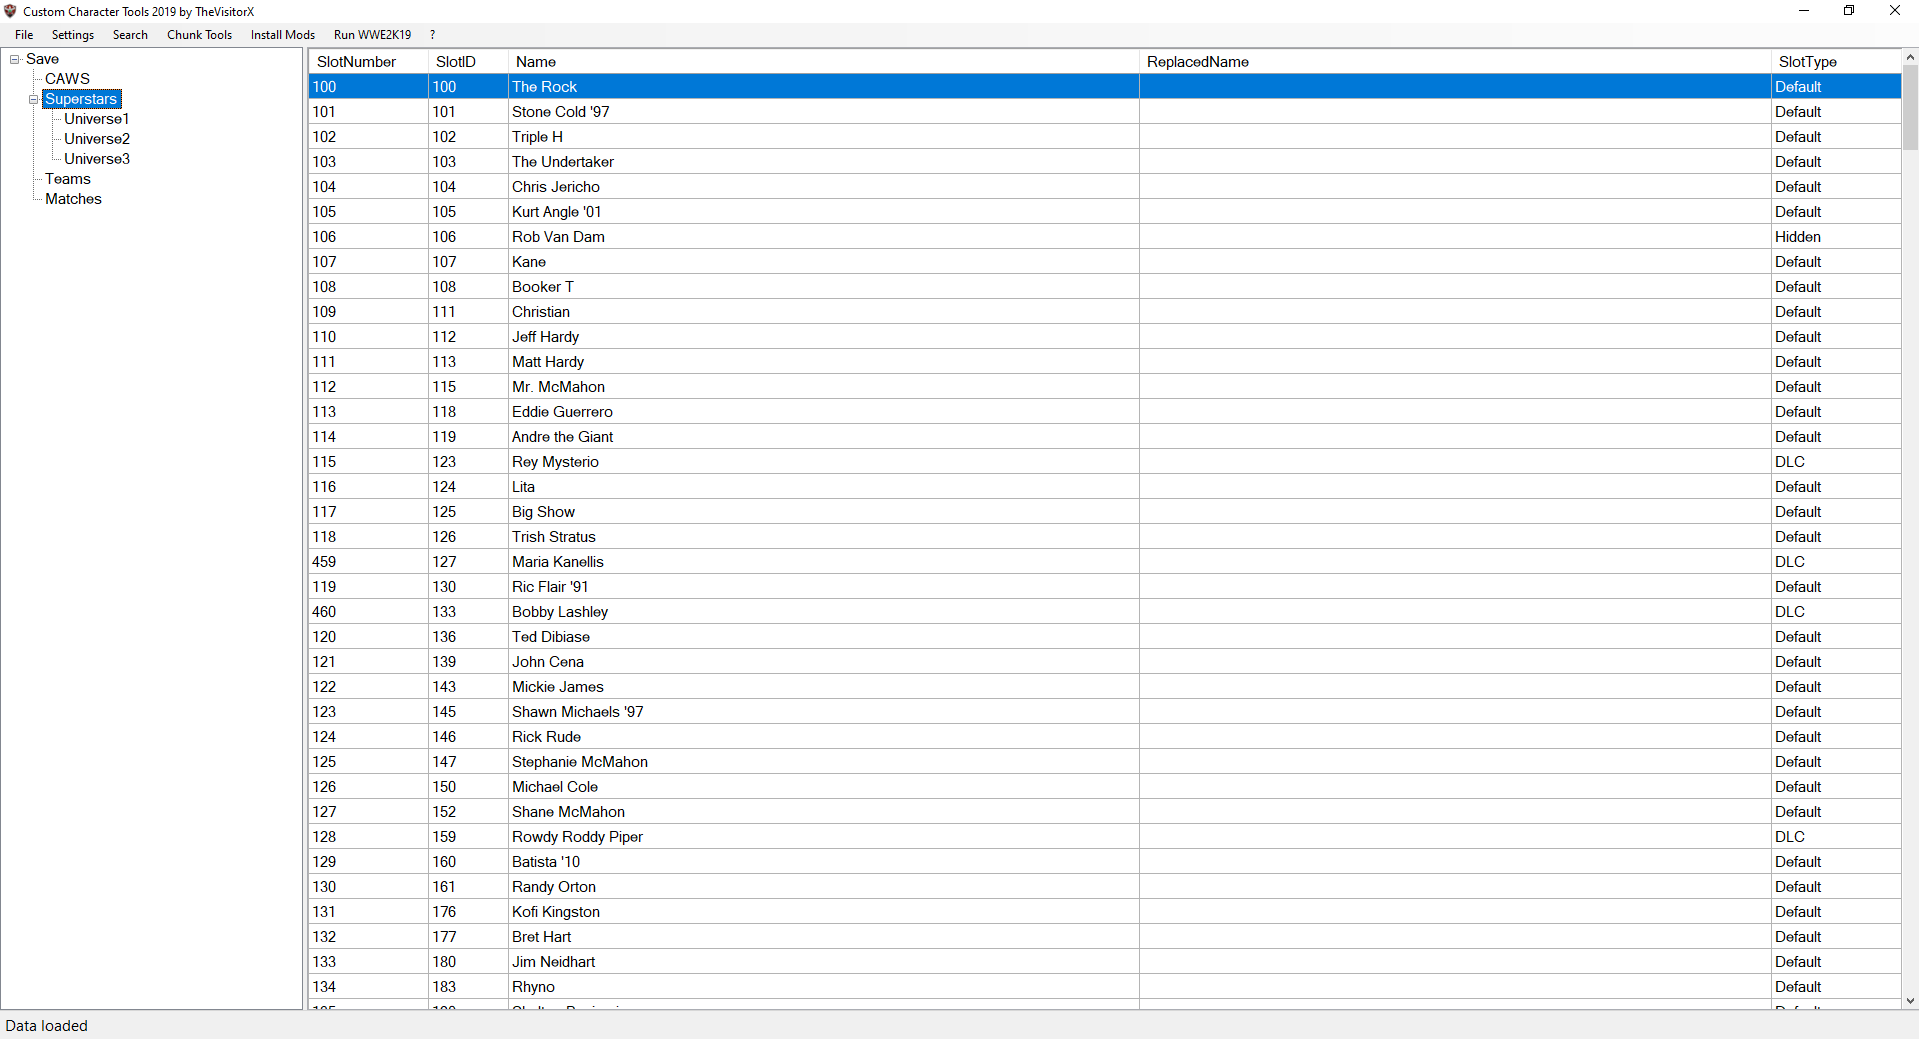
Here you are introduced to a giant list of character names, slot numbers and slot ids. If you wish to familiarize yourself with slot ids and numbers, check out the Wrestler ID pages on the wiki.
If you are happy with your POFO & MOVESET slot ids, skip this next step.
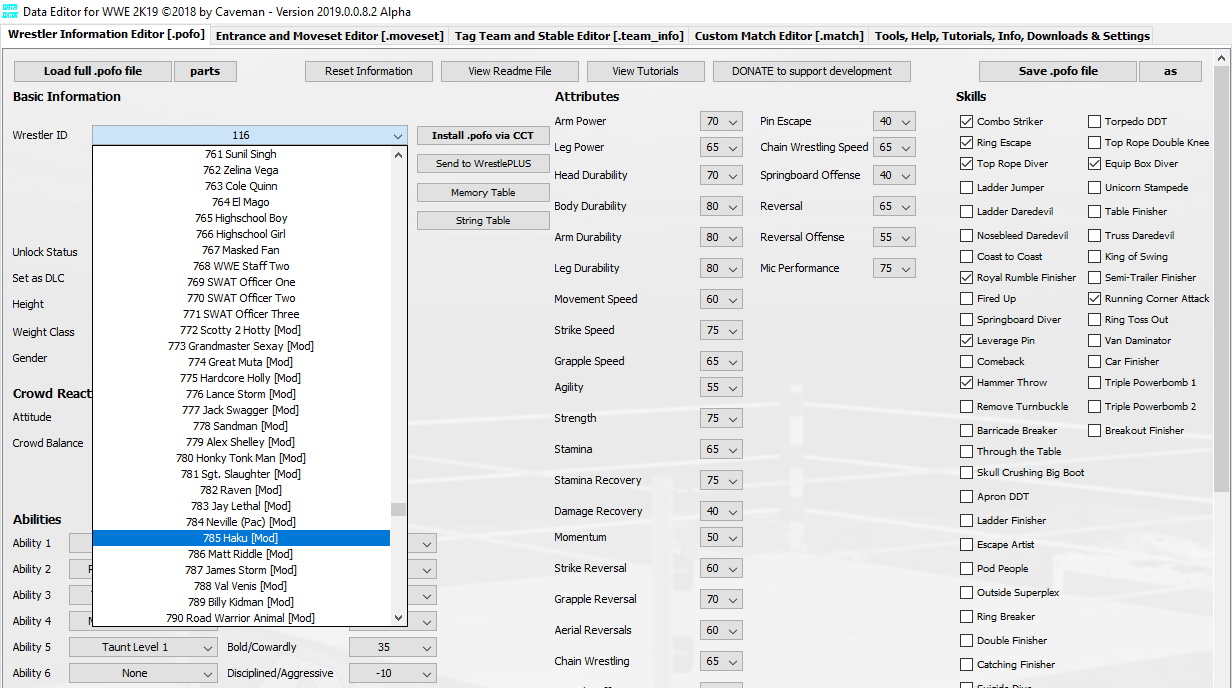
- Refer back to the POFO that you have downloaded into your created folder. Normally, there will be a number at the end of the file. In this case, it's 116. Now, this does not exist from the picture above. What do we do? Very easy, we now load up Data Editor.

You will be presented with an application with many visible features. For this tutorial, we need the POFO tab as seen in the image above. With the POFO tab selected, open your downloaded POFO.
- Click 'Select a Wrestler ID', and choose an id of your choosing. Refer to the Wrestler ID pages, CCT or names in the dropdown. For this instance, we're going to replace Haku (785).
- Click ' Save .pofo file'. You will receive an alert telling you where your POFO has been saved.
Data Editor Install Dir / Files / Pofo /
Locate your POFO and rename it back to your original downloaded one so that you don't lose track. You can now delete your downloaded POFO.
Repeat this process with your MOVESET file.
Step #3 | The Installation
With CCT open, locate the slot id found on the end of your POFO file inside the SlotID column.
- Right click the SlotID and select 'Import > CH-Pac-Files'.

- Select the appropriate PAC file depending on whether it is an Entrance or Ring. To understand the distinction between files. Please read the following detailed breakdown of file names for characters:
For this example, we will be using ch15202.pac & ch15204.pac.
NAME ID ATTIRE TYPE CH: Character 152: SlotID 0: Alt Attire ID (0-4) 2: In Ring
4: Entrance
CCT will do the hard work of installing your character PAC files regardless of the SlotID provided on the downloaded files. Meaning that you should never worry about file names associated with downloaded characters when using CCT other than the ending value (2/4).
- We now choose OK. We will receive a message alerting us that installing these files cannot be undone, select OK.
Step #4 | The Chunk file
If you are unfamiliar with the Chunk file, please refer to this page for full understanding. Now that your files are securely installed into your game, the game needs to know they exist - this is where the .Def file comes into play.
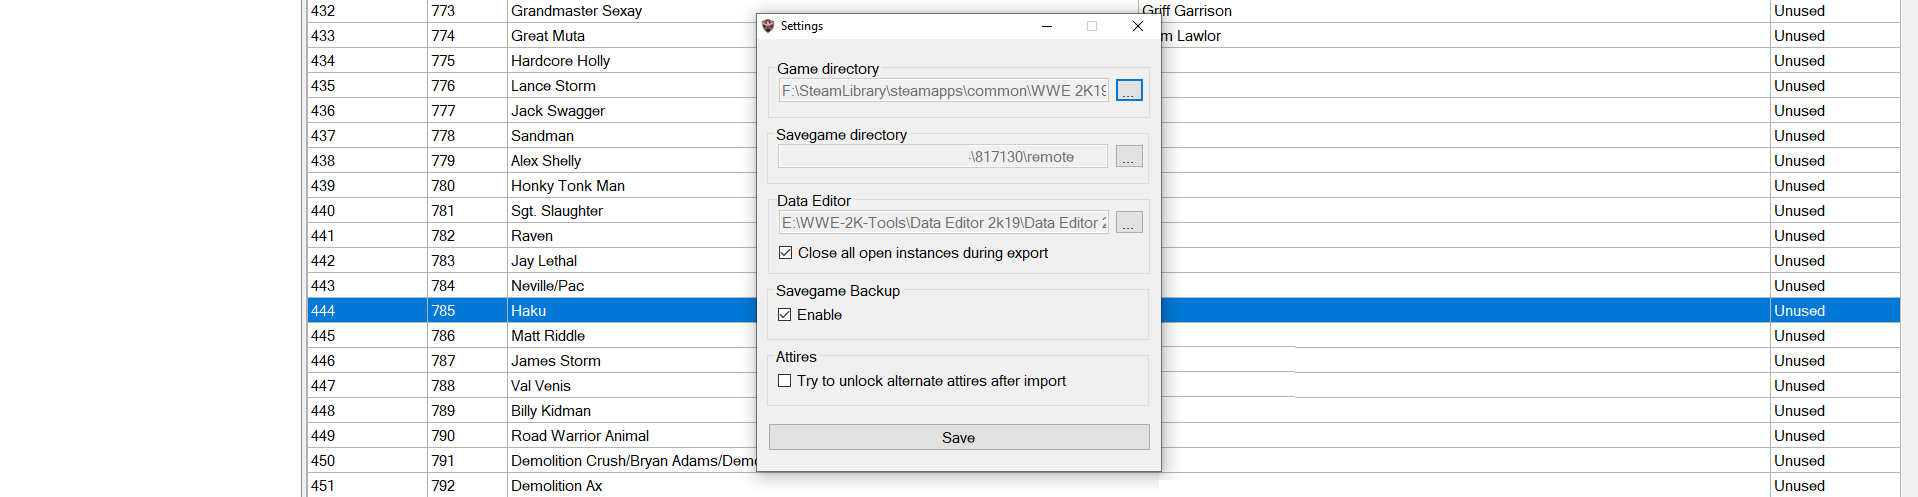
- With CCT still open, check your settings to make sure it knows where your game is located. If this is not set correctly, this process will fail.
- Once this step is OK. At the top of CCT, you will see the dropdown button 'Chunk Tools'. Click this dropdown and select 'Regenerate Chunk0.Def'. A prompt window will appear asking you which method.
- Make sure 'Full' is chosen. Then press 'Start'.
- This will do a full sweep of your game directory and generate a fresh .def file for your game, including your mods.

Step #4 | Let's play.
You're almost ready. Keep CCT open and load your WWE 2K, in this case WWE 2K19.
- Make your way to the main menu of your game.
- Tab back to CCT and right click your SlotID once again and choose 'Import > Pofo' and select your POFO from earlier.
- Repeat this process for the MOVESET.
If you intend to use this character mod in Universe mode, you will need to repeat the import of POFO & MOVESET above in the Universe 1, Universe 2 and Universe 3 dropdown on the left, depending on which one you are wanting it for..
- Locate your character edit menu. In this case (WWE 2K19) it is My WWE.
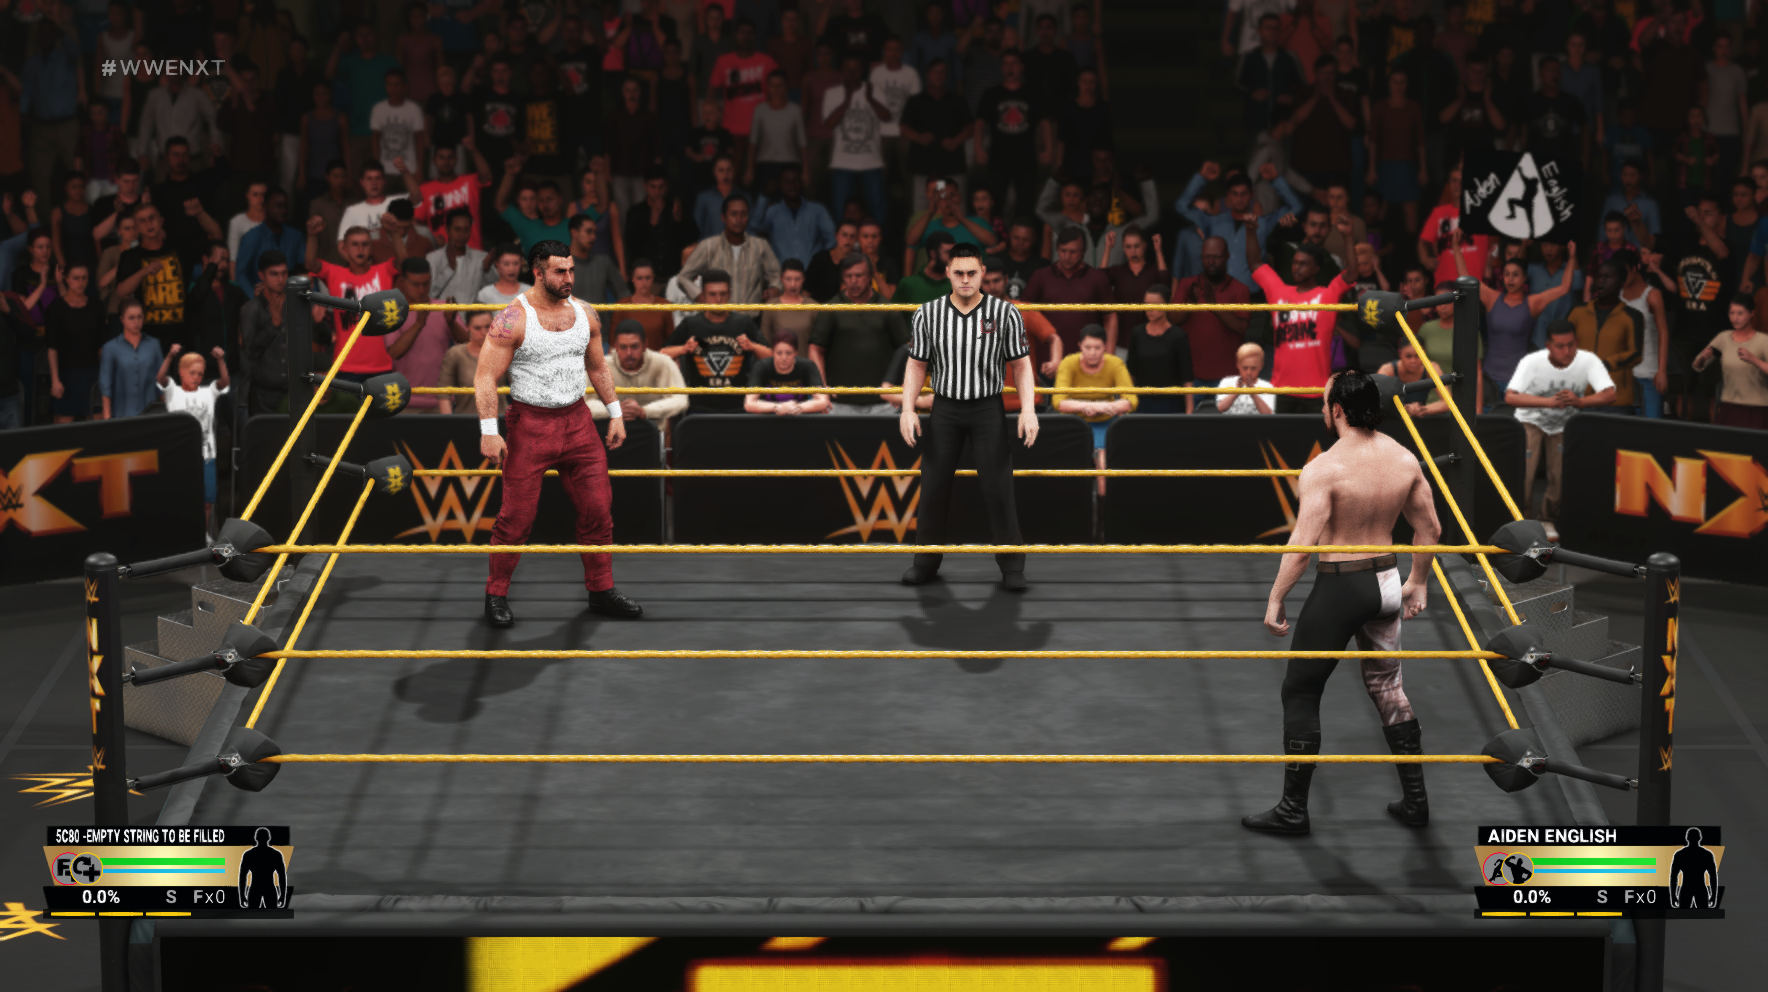
If you followed everything exactly, you will now be presented with the following in your character list.
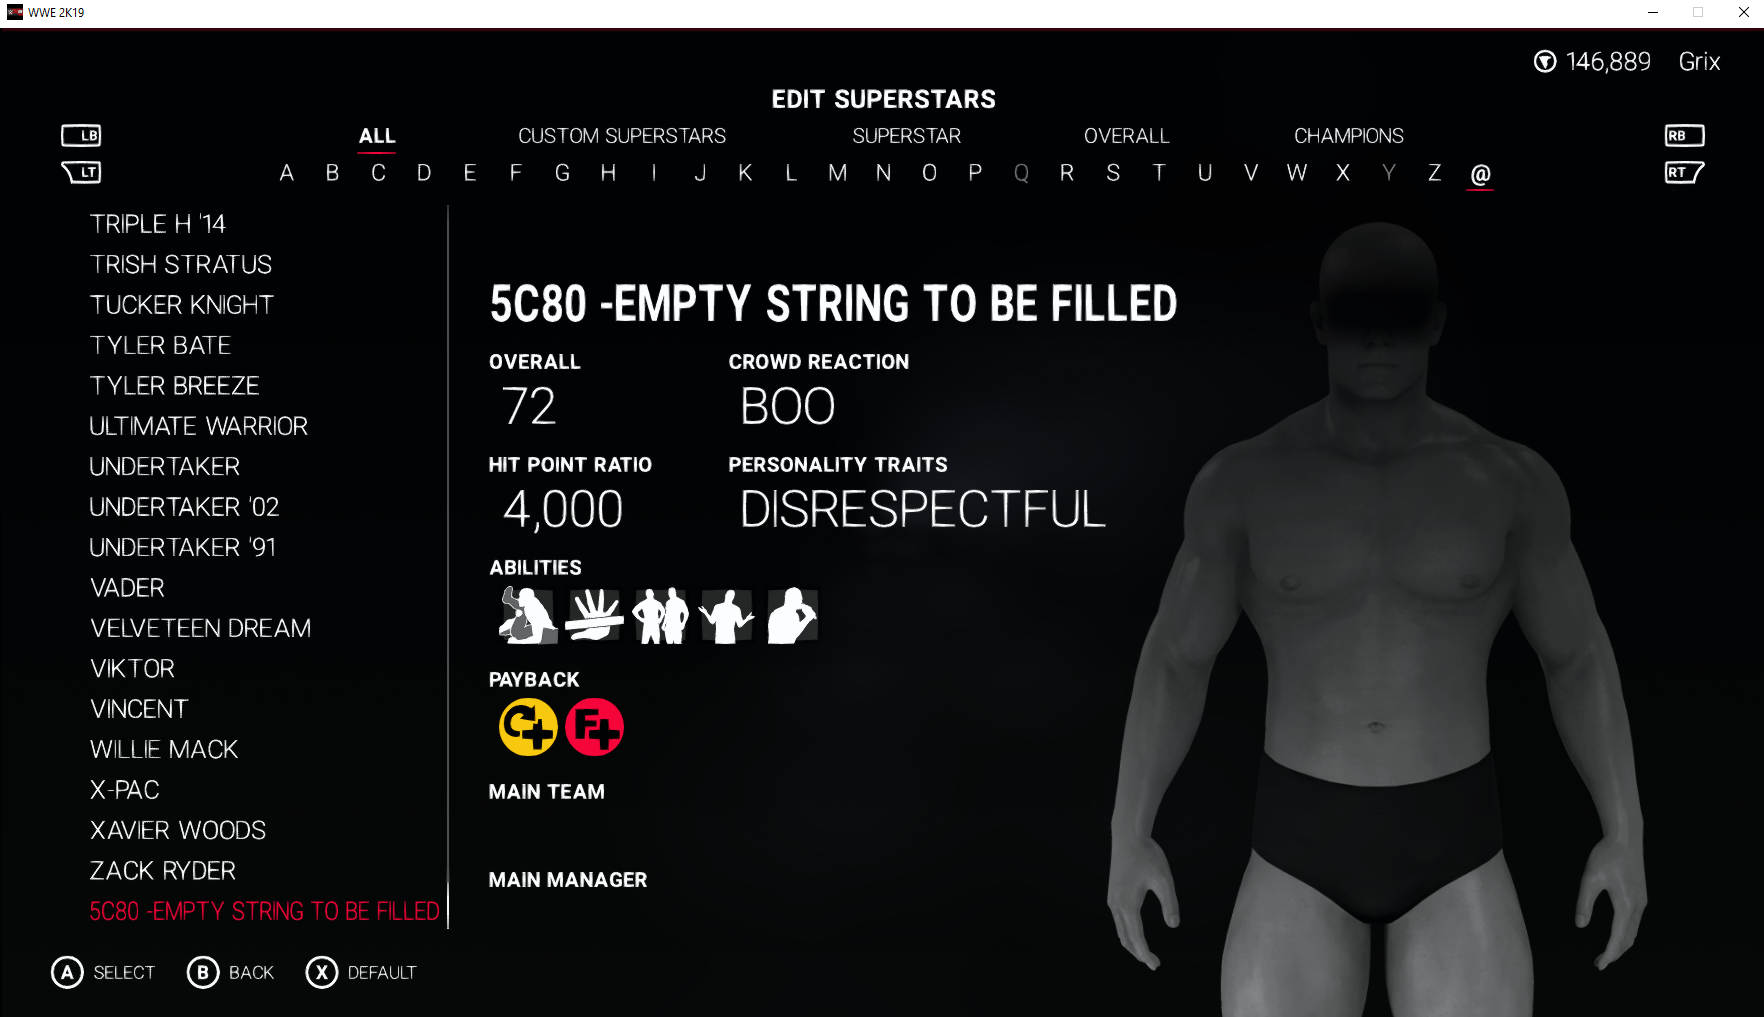
You MUST now cause the game to save. This can be done by editing one of the character stats and choosing to save all. If you do not do this, your character will not be saved/accessible.
Does the name of your character look strange? This is perfectly fine. You will need to edit the name string ids in the POFO with Data Editor. This requires another tutorial and will be posted here when it exists.
Step #5 | Congratulations
Well done! That is the full installation of a brand new character to your game.